Vlan Trunking Protocol (VTP) is a Cisco proprietary protocol used to replicate a vlan database from one switch to another and synchronise the vlans across all participating switches – this is known as the VTP domain. In order for this information to be communicated between participating switches, they must have certain configurations present and must be connected to each other over a trunk link: VTP is only propagated across trunk links. In addition to the trunk requirement, they must also have matching VTP domain information. This consists of the domain name and password, the fields can contain either a string or a null value (no authentication) either way, they must match for switches to share information. For more information on how VTP behaves, see the following introductory post: Introduction to VTP
Verify the current VTP configuration
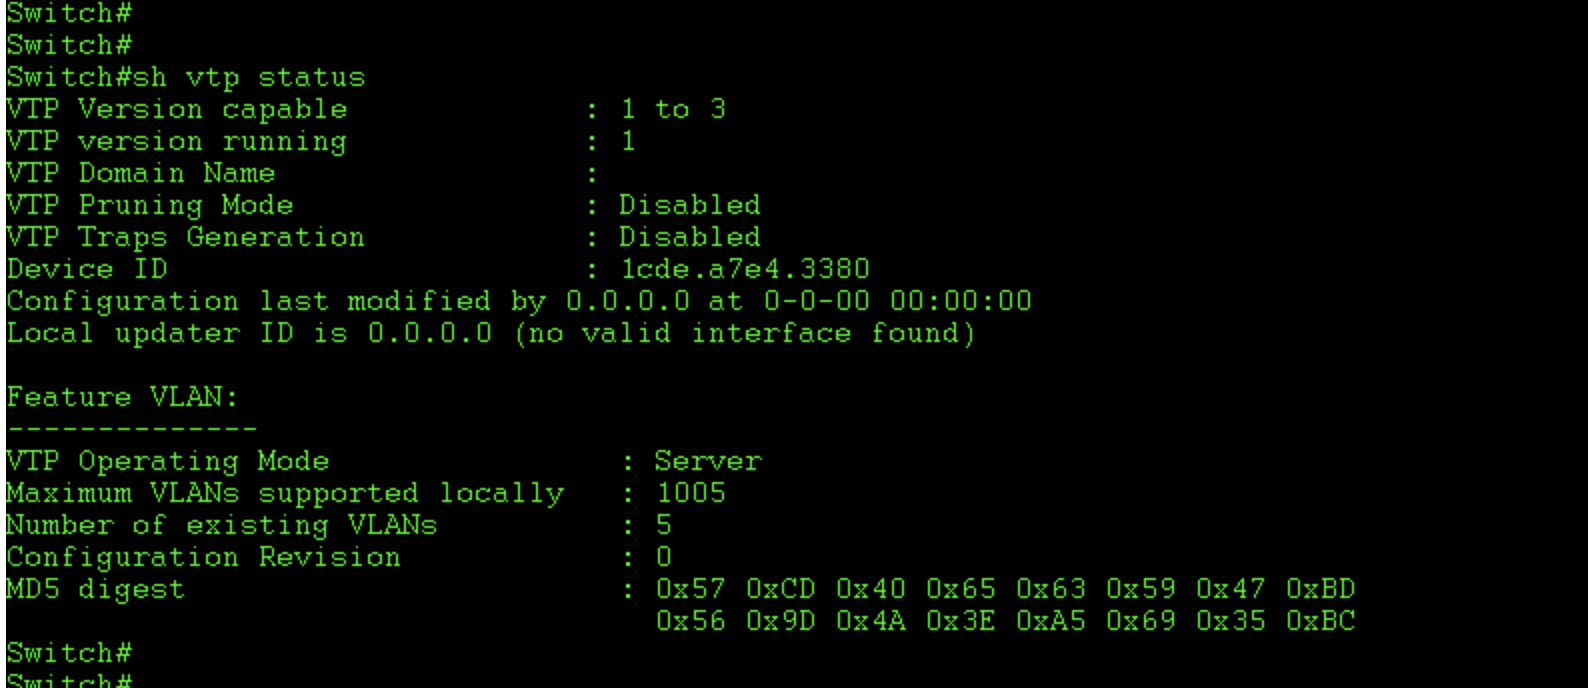
Before doing anything it is probably a good idea to view the current VTP configuration on that particular switch. I have done this in the below example by using the show vtp status command. From this output you can see the support VTP versions and the domain information. Also note the total number of vlans currently configured on the switch: these five are the default on this platform.
Also of interest is the configuration revision number, which is incremented each time a change is made to the database. It’s important to note this number because in older version of VTP (all but version 3) a higher number is thought to be more up-to-date and so, will overwrite existing vlan information across the VTP domain. This can cause severe issues if a new, previously used, switch is introduced into the VTP domain with a higher revision number, as it could wipe all existing vlans. So, it’s best to ensure it is 0 before you add a new switch.

Configure the VTP parameters:
In order to run VTP securely, we need to configure a domain name and password. In VTP version 2 the password is stored in the running configuration, in V3 it is stored in the flash memory in an optionally encrypted form. A password stops an unauthorised switch from joining our domain and attempting to overwrite our Vlan database. Otherwise, this could be done by advertising a VTP update with a high configuration revision number across a trunk link on our networks. In the below example i configure V2 with basic domain name and password combination, in practice i’d be best to use secure complex strings. Ideally use V3 if your switches support it (or don’t use VTP at all if security is a major concern). Note i configure this switch in server mode, meaning it is allowed to create, change and share information with other switches.

Configure the trunk links:
Vtp only works across trunk links. Trunks carry information from multiple vans, whereas access links carry information only for the vlan they are configure to access. Trunks also have a native vlan which is used to carry information which is not attached to a specific vlan. These are called untagged frames. I configure my trunk link to use dot1q encapsulation, which is the industry standard now. Usually it is the default on many switches and so, doesn’t have to be specifically set. However, this layer 3 switch also supports Cisco’s ISL, which isn’t used much anymore due to higher overhead. It also has poorer support for QoS and less overall compatibility.

Create the vlans and associated information:
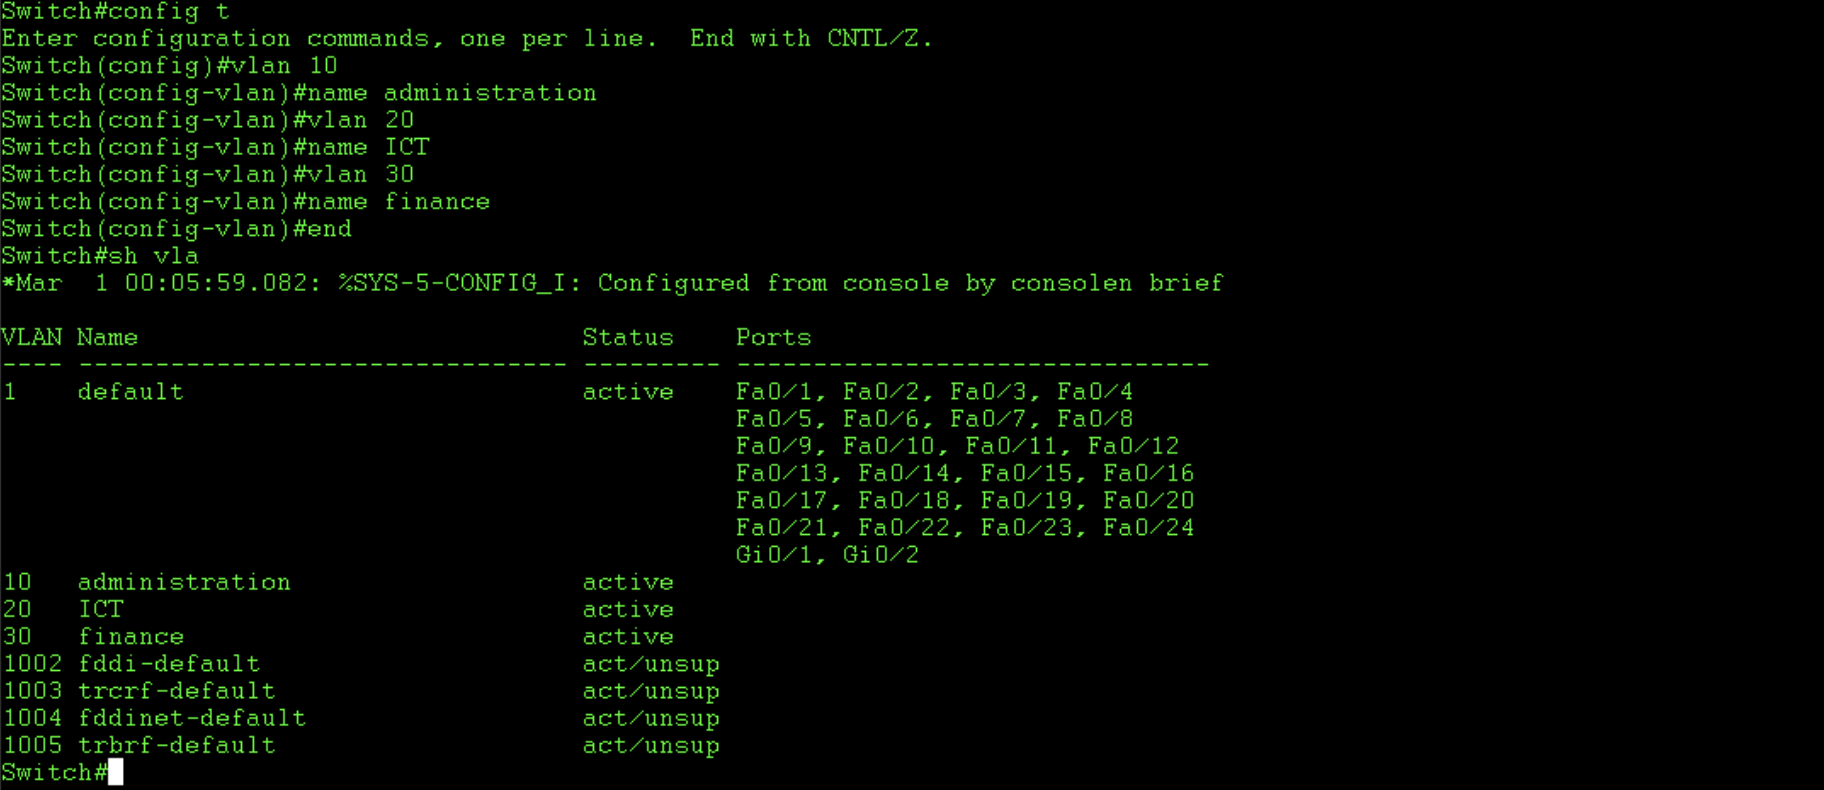
Now that we have configured the VTP parameters, it’s time to add the vlans so that we can test the propagation. There’s a few ways to create vlans on cisco ios, using the vlan database or in vlan config mode. It is also possible to assign a port to a non-existing vlan and it will automatically create it. In the below example i use vlan config mode, which is gradually replacing the traditional vlan database mode. I create vlans, 10, 20 ad 30 and name them. In this example no ports are assigned to the vlans I create.

Configure the neighbouring switch:
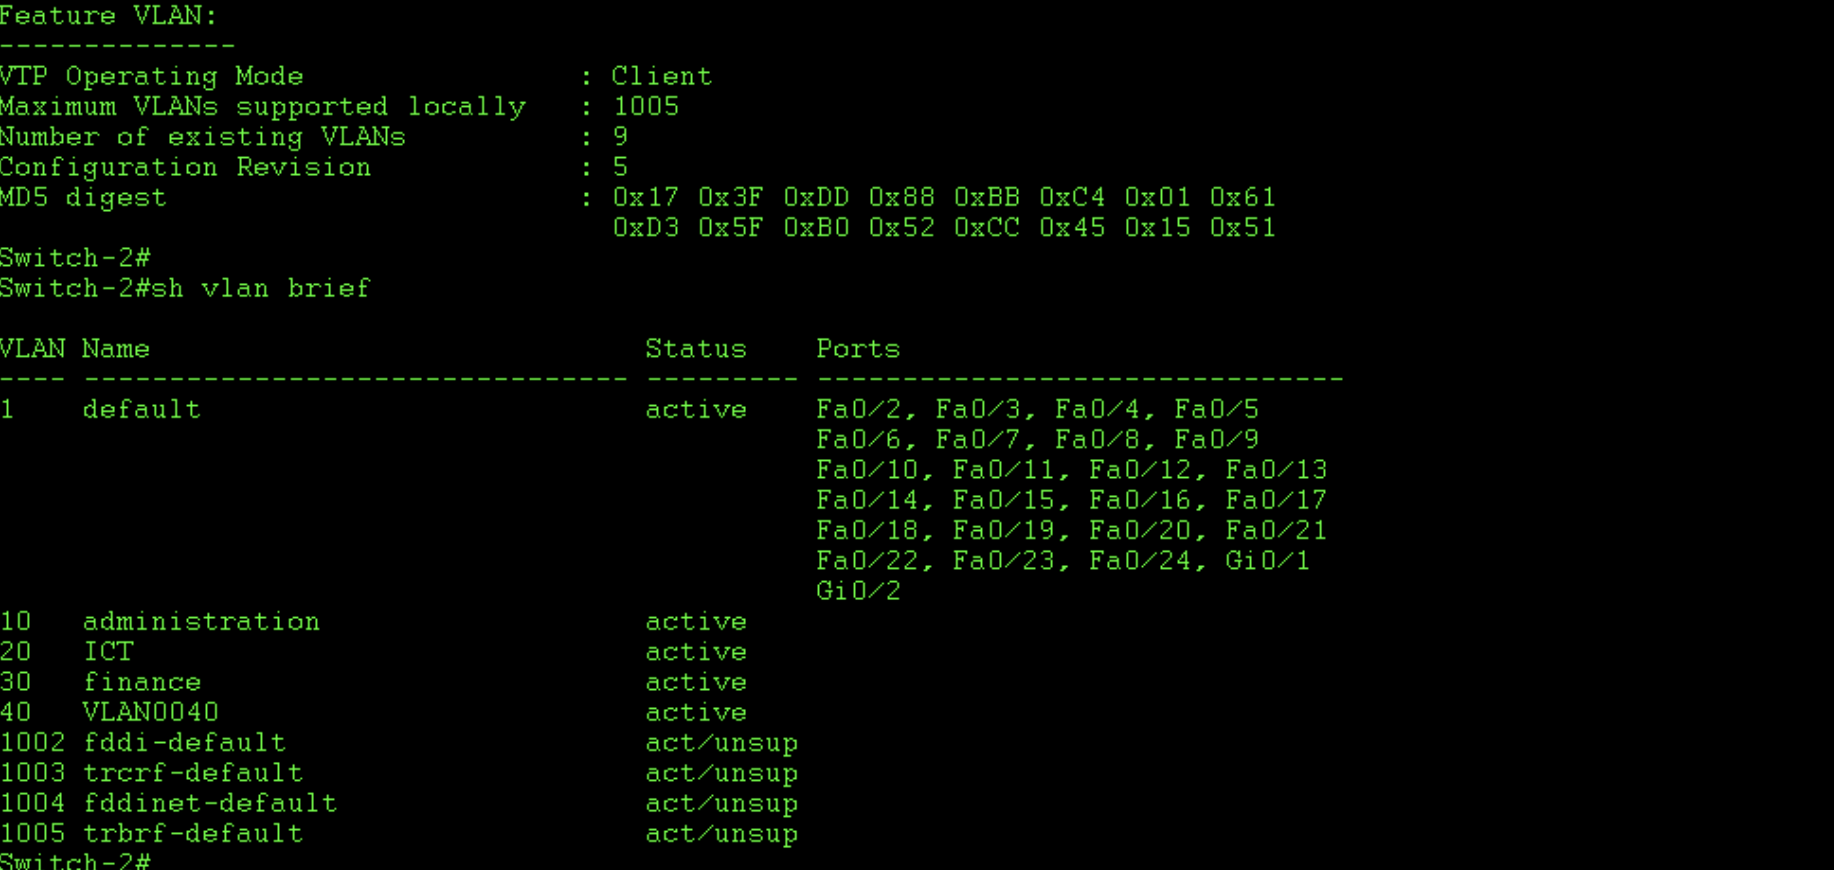
In order to test the propagation of our vlans and our VTP functionality, we need another switch added to our VTP domain. In the below example I configure Switch-2 in the same way as switch one, though I set it to VTP client mode. This means I can learn and share vlans it has learnt from a server but cannot add, remove or modify vlans itself. Take note that when i did this and took these screen shots i made a mistake with the password on switch two and later changed it so that it could join the domain (they are mismatched in my screenshots).

Verify that the neighbours have learnt the vlan assignments:
The example constructed for this article focuses on only two switches. If you decide to use VTP in your production network, you will need to verify the assignments on the appropriate switches, after properly configuring each switch to join the, hopefully secure, domain. I would like to reiterate here that VTP version 3 comes with added security features which i’d highly recommend you implement if your devices support it. It is also worth carefully considering whether to run VTP at all. If you need vlans only locally on each switch, as oppose to end to end, it may be best to manually configure them, perhaps via a script, on each device. Certainly VTP version 3 is fairly secure, but nothing is more secure than manual configuration (except in some odd cases). Below i verify that the neighbouring switch has learnt the vlan assignments from the VTP server switch.
